Episode 3: Life After Life

After establishing a base of operations in the 'Safe Haven' mission, Olivia mentions seeing smoke rising in the distance and a small town marked on the map. This gives you two options to search for allies to fight against the Baron and his army.

🏆 Reward: Completing 'Like Another Lifetime' grants your first weapon mod and a machete that can equip the mod. The reward is hidden in the journal.

Investigate the Town or Smoke Column

To begin your exploration, you can head to the town or toward the smoke column. Either way, you'll eventually reach the town, but the cause of the smoke will only last a short time. You don't have enough time to check both locations before triggering the next part of the mission. Heading toward the smoke allows you to explore and ensures you won't miss any extra backstory or dialogue. 
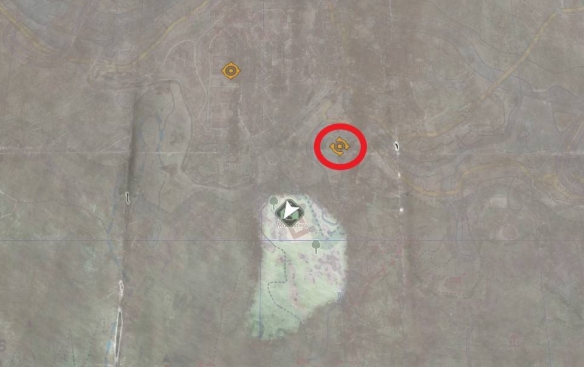
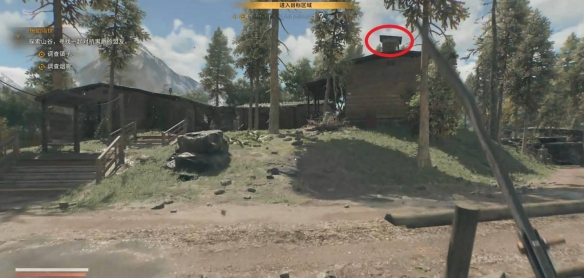
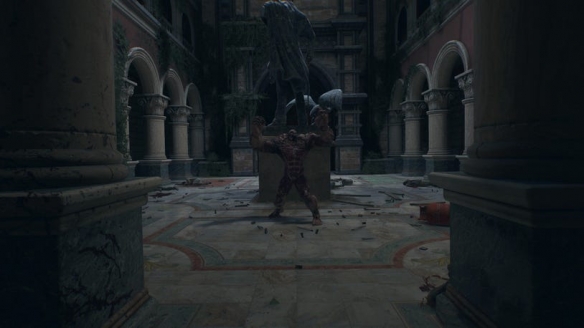
The smoke column leads to a camping area in the northeast part of the map. The mission indicator isn't as solid as the 'Investigate the Town' indicator, so you can tell which direction to go. You'll encounter dozens of enemies, especially when approaching the cabins. Try to climb onto rooftops or high ground whenever possible to avoid being surrounded by biters.
Investigate the Town or Smoke Column

Find the Grumpy Survivor

In one of the cabins, you'll find a grumpy man. He was kicked out of City Hall for not following the rules, but he prefers being on his own outside anyway. Depending on how quickly you reach the cabin, you can turn around and head to the town. If you decide to check out the town, you'll pass through the monastery garden and into the national park trails. Old Town is north of your first safe zone. Made of timber and stone buildings, it gives off a quaint French/Bavarian countryside feel.
Find the Grumpy Survivor

Head to City Hall

No matter which direction you go, you'll eventually overhear an emergency distress call over the radio from someone at City Hall. City Hall is located in the center of Old Town and is under attack by infected. Once you enter Old Town, use rooftops to avoid most of the infected wandering the streets. You'll still encounter some enemies, but your chances of being surrounded are much lower. Many buildings are connected or within jumping distance. For those farther away, you can walk along power lines or use ziplines to reach more distant destinations.
Head to City Hall

Enter City Hall

After reaching the City Hall building, you need to get down to ground level. The entrance is at the edge of a courtyard surrounded by fences. There are quite a few infected wandering nearby, but you can run past and climb over the wrought iron fence without fighting them all. Open the double doors to enter the building.
Enter City Hall

Clear the Terrace of Infected

As you walk through the hall, you can hear survivors running to safety. You're directed to a massive interior terrace. The infected haven't ventured further because the hallway is blocked. To reduce enemy numbers, use available fuel cans to blow up some wandering zombies. If you've crafted a bow or have throwing knives, you can also shoot arrows at them. Headshots can instantly kill these low-level enemies, giving you some breathing room when you actually enter the area. Climb over the barricade and deal with the remaining infected. Keep some fuel cans intact. When the last regular zombie falls, a Chimera will charge into the terrace.
Clear the Terrace of Infected

Defeat the Chimera 'Flawed'

This Chimera is slightly larger than the previous one. It's named 'Flawed', but it's not flawed when it comes to dealing damage. Killing 'Flawed' rewards you with 1 Beast Point.
Defeat the Chimera 'Flawed'

Find the City Hall Survivors

After the Chimera dies, you can search for the survivors you heard earlier. They're in the conference room behind the double doors. Jacob, one of the survivor leaders, talks to you about the current situation. Their defense officer, the Sheriff, went to the tower to restore power. She hasn't returned, and the power is still out. Night is approaching, yet there are no UV lights to protect the survivors. Jacob asks you to find the Sheriff and get the lights back on.
Find the City Hall Survivors

Head to the Tower to Help the Sheriff

First, climb to the second floor. Two sections of railing are broken. Climb up a pillar, then move to the top of the arch below the opening. Pull yourself up to the second floor. Once there, head to the hatch leading to the tower. The ladder at the bottom has been raised, so you need to jump up to enter the tower interior. Climb the stairs until you encounter a biter and an injured ranger. Thanks to that zombie, the ladder to the top has fallen down. The man is injured and can't help you. Climb to the tower top to meet the Sheriff, who's currently facing off against multiple infected. After a cutscene, she accepts your offer to help restore power.
Head to the Tower to Help the Sheriff

Restore Power - Part 1

While the Sheriff covers you, slide down the zipline to reach the adjacent building. You can deal with the infected yourself, or let the Sheriff snipe them for you. Either way, enter the building and deal with the infected in the right corner. After clearing the area, pick the lock on the room door. At the back of the room is the distribution box. Open it and you'll see electrical sparks that shouldn't be happening. Likely an infected broke the wire leading to the tower.
Restore Power - Part 1

Restore Power - Part 2

Before taking the cable reel on the right side of the distribution box, go to the ventilation duct on the left side of the box and remove the cover. This leads directly to the hallway. Grab the cable and take it through the ventilation duct. Exit the building door and head to the clock tower. Use the pillars on the left or right to start climbing. Move to the clock face and jump up to the right hand. Move along the hand to the left side of the clock. Jump from the tip of the hand to the left pillar. Climb up to the next level, then jump back to the main tower. Climb into the tower top and plug the cable into the distribution box.
Restore Power - Part 2

Mission Complete

With the Sheriff rescued and power restored, a cutscene follows. Finally, the 'Like Another Lifetime' mission is complete. You receive a machete and an Acidic Universal Tip mod.
Mission Complete