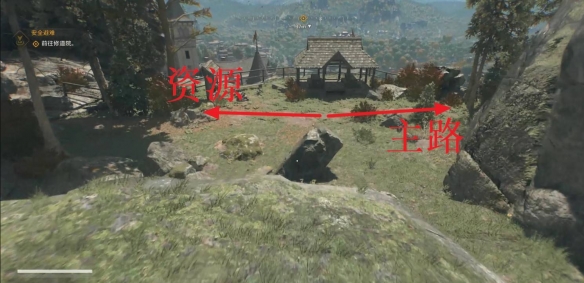
Head to the Monastery
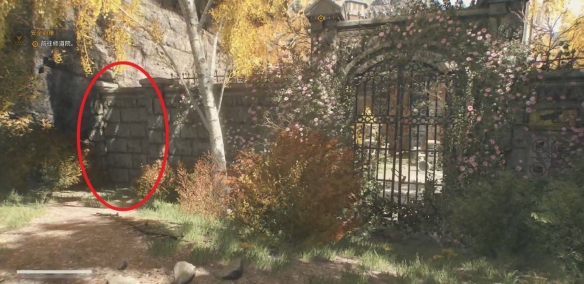
The first section of the trail is quiet with no infected and nothing to see or scavenge. However, once you pass a rock barricade, you'll encounter an enemy feasting at a rest stop beside the trail.
You'll receive instructions on how to perform a stealth kill from behind. The easiest method is to crouch and move along the left side of the area, going behind the bulletin board. Sneak up behind the infected and trigger the stealth kill.
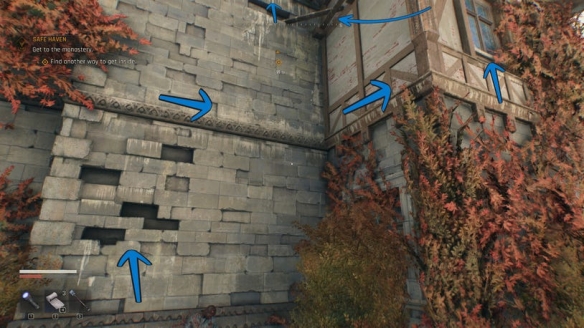
After dealing with it, loot the body and pick up a new weapon before continuing down the path. Again, there's nothing to interact with or scavenge here. You mainly need to swing across a broken bridge to reach the monastery's outer wall. Otherwise, it's a simple walk there.